Monday 30 May 2011

Cars and more

Just last week in school I saw these on my way to class but was so in a rush that I simply captured it with my eyes, and afterwards  I saw it still parked right outside the Arts block and then there was another one...rather cool. This just reminded me of my father Volkswagen Beatles back when I was a kid!
Oh never mind the dates!  So I remember a T.V program I used to see "some mothers do have them" with Mr. spencer :)....


Sunday 29 May 2011

Oleku...!

Recently I went for a traditional wedding and in it the bride was all beautifully attired in Iro and Buba ( wrapper and blouse) which is the customary thing to wear....I couldn't get the pictures :( .
So I've decided to replicate it for you to see what I would potentially look like during mine and what several other Yoruba women (that's my tribe by the way) have looked like or will one day look like during thiers.
The beauty of this is that this combo style can be used for several occasions depending on the dexterity and persona of the lady. So ladies here we go.... 


To make this, you will nee:
a doll, glue gun, fabric glue, tape measure, some fabric and a shearing scissors.

 Now, you will need to measure the shoulders of your doll to make the Buba (blouse). After this you cut out your fabric. This doll here shoulders is 2" but I added 2" extra for stitch allowance and ease. Note the Buba measurement is meant to be a little more than the shoulder so that's why I made mine 3".
Now you will have to fold your buba fabric into 4 and cut out your neck region in circular motion just like this...

 So you will have something like this...
the two extra piece you see right there is for the sleeves.
Now what you have to do is glue the fabric pieces into place.
Just like this.... then you flip the sleeves over and ...put some more glue on the right side of the buba to get the sleeves into place...


Gently turn the glued buba inside out...to have something like this


To make the Iro (wrap around skirt but tied into place at the back)...cut out a
10" by 13.5" fabric using your zig-zag scissors, 
3" by 7" for the head gear and
3" by 9" for the flip over shawl


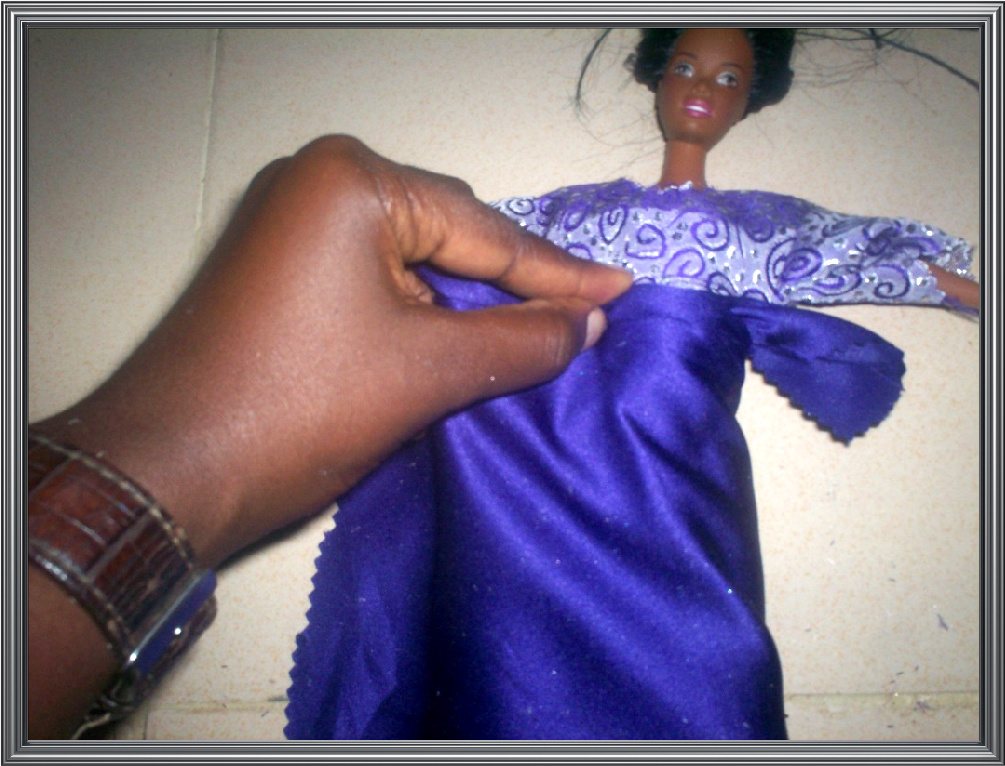
Next thing is to tie the Iro (wrap) around our doll... to do this, first open wide the doll's leg and place her on the Iro fabric
 
  
wrap around and flip the doll backward and tie at the back to keep in place


To finish off, tie the head gear and put the Ipele (shawl) over the shoulder.


Ok! just so you know heres what it really looks like ....

Sunday 15 May 2011

Scarf Amour

How To: Scarf Tying

Ah! Today is going to be filled with lots of fun! Here in Nigeria we are a lover of scarves and I must confess I'm an addict. They just look so good and create this special effect when you have them on. The wonders of scarves! So I decided to do a scarf  tutorial today. I needed to use a doll so that I can easily show you the steps, not only this I jazzed it up with various colours of flowers for different effects and moods....Enjoy this as I'm sure you will!


Here we go.......

You will need your:

Scarf of any colour
Brooch pin/ safety pin
Flowers to jazz
 and of course your Head :)

Step1:

Fold your scarf into two equal halves and place over your head just like this...


Step 2:
Arrange the scarf in such a way that the right hand of the scarf is 3/4 longer than that of the left hand; this way you have a little end of the scarf on your left hand side than on the other.


Step 3:
Now take both ends to the back and cross over, that is, left over right...and right over left.


Step 4:

Twist the long end of the scarf on your left hand and wrap around your head to the back to meet the other scarf end on your right and gently tie so that it sits well on your head. Remember that the scarf is to cover both ears for that look.
I asked my little friendly neighbour to assist in hold the scarf down as it went all slippery on the doll.


Step 4:

Twist the loose ends still and gently but firmly tuck them over each other to make it look like...


Then bring over the other loose ends and tuck over the first one still in the same direction.


So you have what looks like this at the back

 and  this at the front...

Now for the fun part! Jazz it up with flowers. Simply glue a brooch pin or safety pin to the stem of the flower and attach to where we tucked in our loosed scarf ends for that perfect touch.


Hope you enjoyed this and I hope you go back and try this! Have a swell time.

Sunday 8 May 2011

All Framed Up!


A happy Sunday everyone!


Just after making the Shimmered brooch, something caught my attention… a wall clock gone bad which I had been keeping for quite a while without an idea of what to do with it and why I keep it.  then just by putting the brooch on a corner of the clock  gave me the idea of turning the clock into a picture frame.

Oh! I totally forgot to set the date and timing on my camera!  :)

                                Before                                                             After

So to make this you will need:
A clock gone bad
Screwdriver
Stick- glue 
Scissors
Cardboard paper
A picture
Flowers


Step 1:
Deconstruct the clock by removing the glass off it with your screw driver and the ticking hands .


Step 2:
Cut the cardboard or paper to fit the size of the glass and using your stick glue, cover the numbering up.
After this pick up any of your favourite picture and glue it on the cardboard. Remember to position it right on the cardboard for it to look right. Now cover it  up with the glass and screw back in place.


Step 3:
Glam up the framed picture with flowers. I used my shimmered brooch and other fabric flowers I had made in times past.


Step 5:
I love butterflies and decided to add one to my frame.


I do hope you would enjoy doing this on your own as much as I did.
Happy Sunday and God’s blessing in this new week.
Happy blogging!

Related Posts Plugin for WordPress, Blogger...